3. Assembling Your Project
Now you have gathered the parts required for your project you need to wire them together. as we continue our example we have a Raspberry Pi, a HAT adapter, a relay module. an ADC module, a vacuum pump, vacuum chamber, and a solenoid valve. Plumbing the vacuum equipment and pressure sensor is beyond the scope of this tutorial, so we’ll just focus on the electronics here.
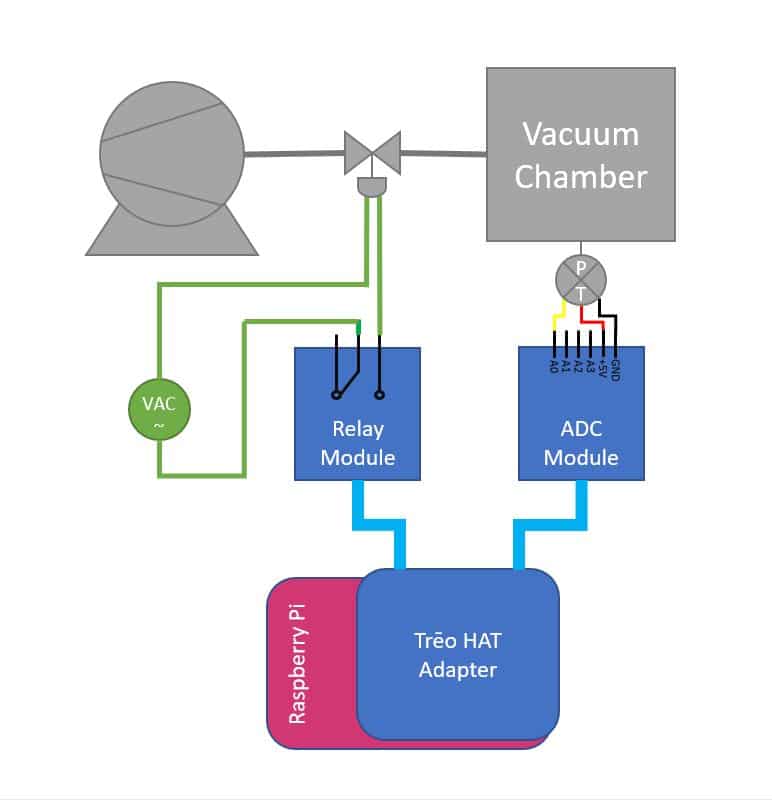
First, we will wire together the Trēo modules. The HAT adapter is attached to the Raspberry Pi and then the realy and ADC modules are attached to the HAT using Trēo cables. When connecting the modules, each module’s S connector must be connected to an adapter’s M connector with the matching protocol (e.g. I2C, SPI, GPIO, etc.) For more details on this, see our Electrical Hookup article.
Now we wire the solenoid valve to the relay module. In the illustration the solenoid valve is normally closed and operates at 120VAC. The power from the source is wired to the solenoid and the return path is wired through the relay’s normally open (N.O.) and common (COM) terminals and back to the source. Now the solenoid valve will open when the relay is engaged.
The pressure transducer is wired directly to the ADC module. The transducer is powered from the 5V and GND terminals of the ADC and the analog voltage signal from the transducer (yellow) is wired to analog channel 0.
That takes care of all the wiring. Next we have to make sure that all of the development software is correctly installed. This is discussed in the next article.