Getting Started with energyDuino
The energyDuino is an Arduino board with a rechargeable battery built-in! The Arduino portion of the energyDuino behaves as an Arduino Uno board. The power circuitry supplies 5V and 3.3V to the Arduino and anything attached to the power pins. The energyDuino is capable of supplying 1A at 5V and 300mA at 3.3V. The battery is fully protected from over-discharging and it can be recharged from the USB connector.
Uploading Sketch
- Set Board to Arduino Uno.
- Connect USB Micro cable between the energyDuino and the PC.
- Select appropriate COM port from the Port menu.
- Click UPLOAD!
Turning the Power On and Off
The energyDuino can be turned on and off from the switch or and external power switch. The energyDuino is designed to allow the use of an external power switch by wiring the switch between the RAW and EN pins. The external power switch has OR logic with the main switch. Leave the main switch in the off position to give control to the external switch.
Charging Battery
The battery charges through the same USB port that is used to upload sketches.
- Connect a USB Micro cable to a power source capable of sourcing 500mA. (USB 2.0 or greater)
- The CHG (charging) LED will light up while the battery is being charged and turn off when the charging is complete.
- A full charge requires 6-8 hours of charging.
Power ON While USB is Connected
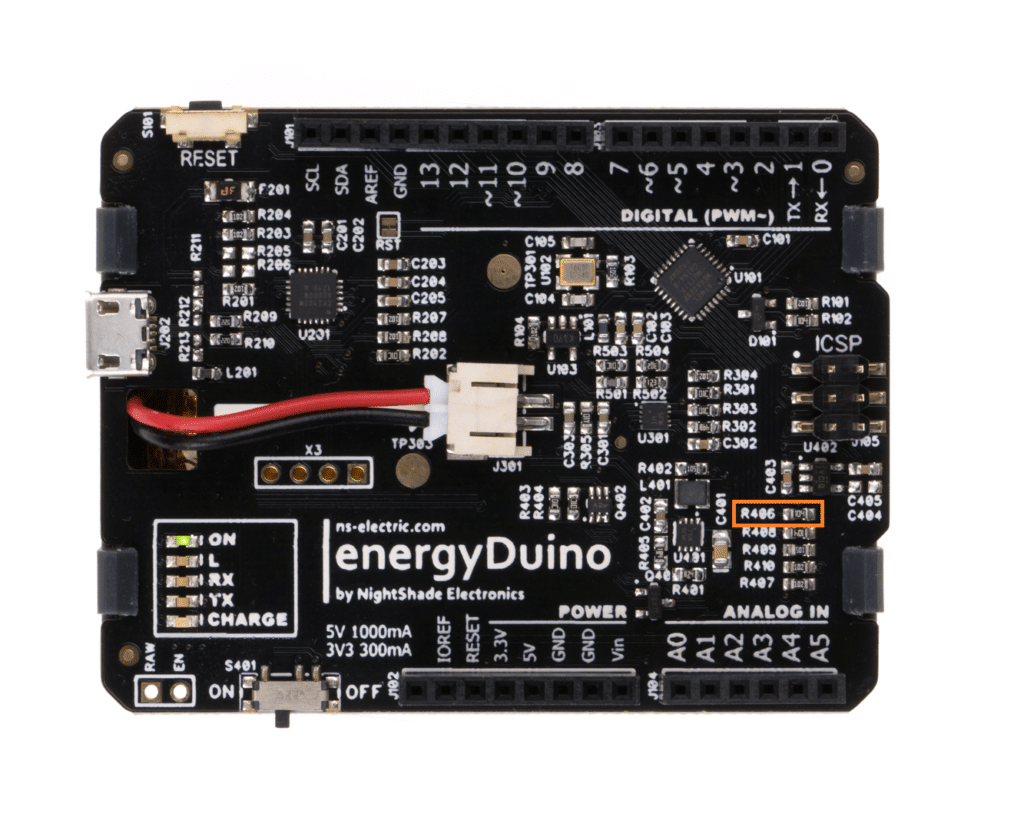
The energyDuino will power ON when the USB is connected. If you would like to disable this feature, remove resistor R406 with a soldering iron. (This feature may be removed in a later version of the energyDuino.)

